Richard Doherty | November 7, 2022
Background
I am passionate about languages and linguistics so I figured combining those with programming would be a good idea. That's exactly what I did two years ago with this app. I had a phase years ago where I would learn alphabets for fun. Very nerdy, I know. But hey, I enjoyed it. I learned Hangul and the Cyrillic alphabet, and I was interested in trying Japanese by the time I had the idea for this project. I used flashcards to study the other alphabets I learned so making my own flashcard app to help me learn Japanese and practice programming was a no-brainer.
What I Used to Make This App
This project was primarily done in React, with a small Python script I wrote to convert an excel file into a format I could use with React.
First Steps
The first thing I did was create a new React app by running this command:
npx create-react-app japanese-flashcardsnpx create-react-app japanese-flashcardsNext, I made two spreadsheets in Microsoft Excel for both Hiragana and Katakana, where I matched up the characters with their corresponding sounds in English. I wrote a python script, which included a library called pandas, to read the excel file and create a JSON string I could use for the cards.
# -*- coding: utf-8 -*-
import pandas as pd

# Read In Data
df = pd.read_excel("./Hiragana.xlsx", header=0)

# Create JSON String
json_string = df.to_json(orient="records", force_ascii=False)
json_string = "var data = " + json_string + ";"

# Write to file
# https://stackoverflow.com/questions/16346914/python-3-2-unicodeencodeerror-charmap-codec-cant-encode-character-u2013-i/28041598
text_file = open("Hiragana.js", "w", encoding='utf-8')
text_file.write(json_string)
text_file.close()# -*- coding: utf-8 -*-
import pandas as pd
# Read In Data
df = pd.read_excel("./Hiragana.xlsx", header=0)
# Create JSON String
json_string = df.to_json(orient="records", force_ascii=False)
json_string = "var data = " + json_string + ";"
# Write to file
# https://stackoverflow.com/questions/16346914/python-3-2-unicodeencodeerror-charmap-codec-cant-encode-character-u2013-i/28041598
text_file = open("Hiragana.js", "w", encoding='utf-8')
text_file.write(json_string)
text_file.close()The JSON string would then be formatted like this:
{
    "id": 1,
    "japanese": "あ",
    "english": "a",
    "category": "Hiragana"
}
{
"id": 1,
"japanese": "あ",
"english": "a",
"category": "Hiragana"
}Looking back on it, simply writing the JSON file and cutting out the extra steps of using Excel and pandas would have been more efficient. At the time, I was interested in trying to write a Python script with pandas that read an Excel file, so that's why I chose to do it that way.
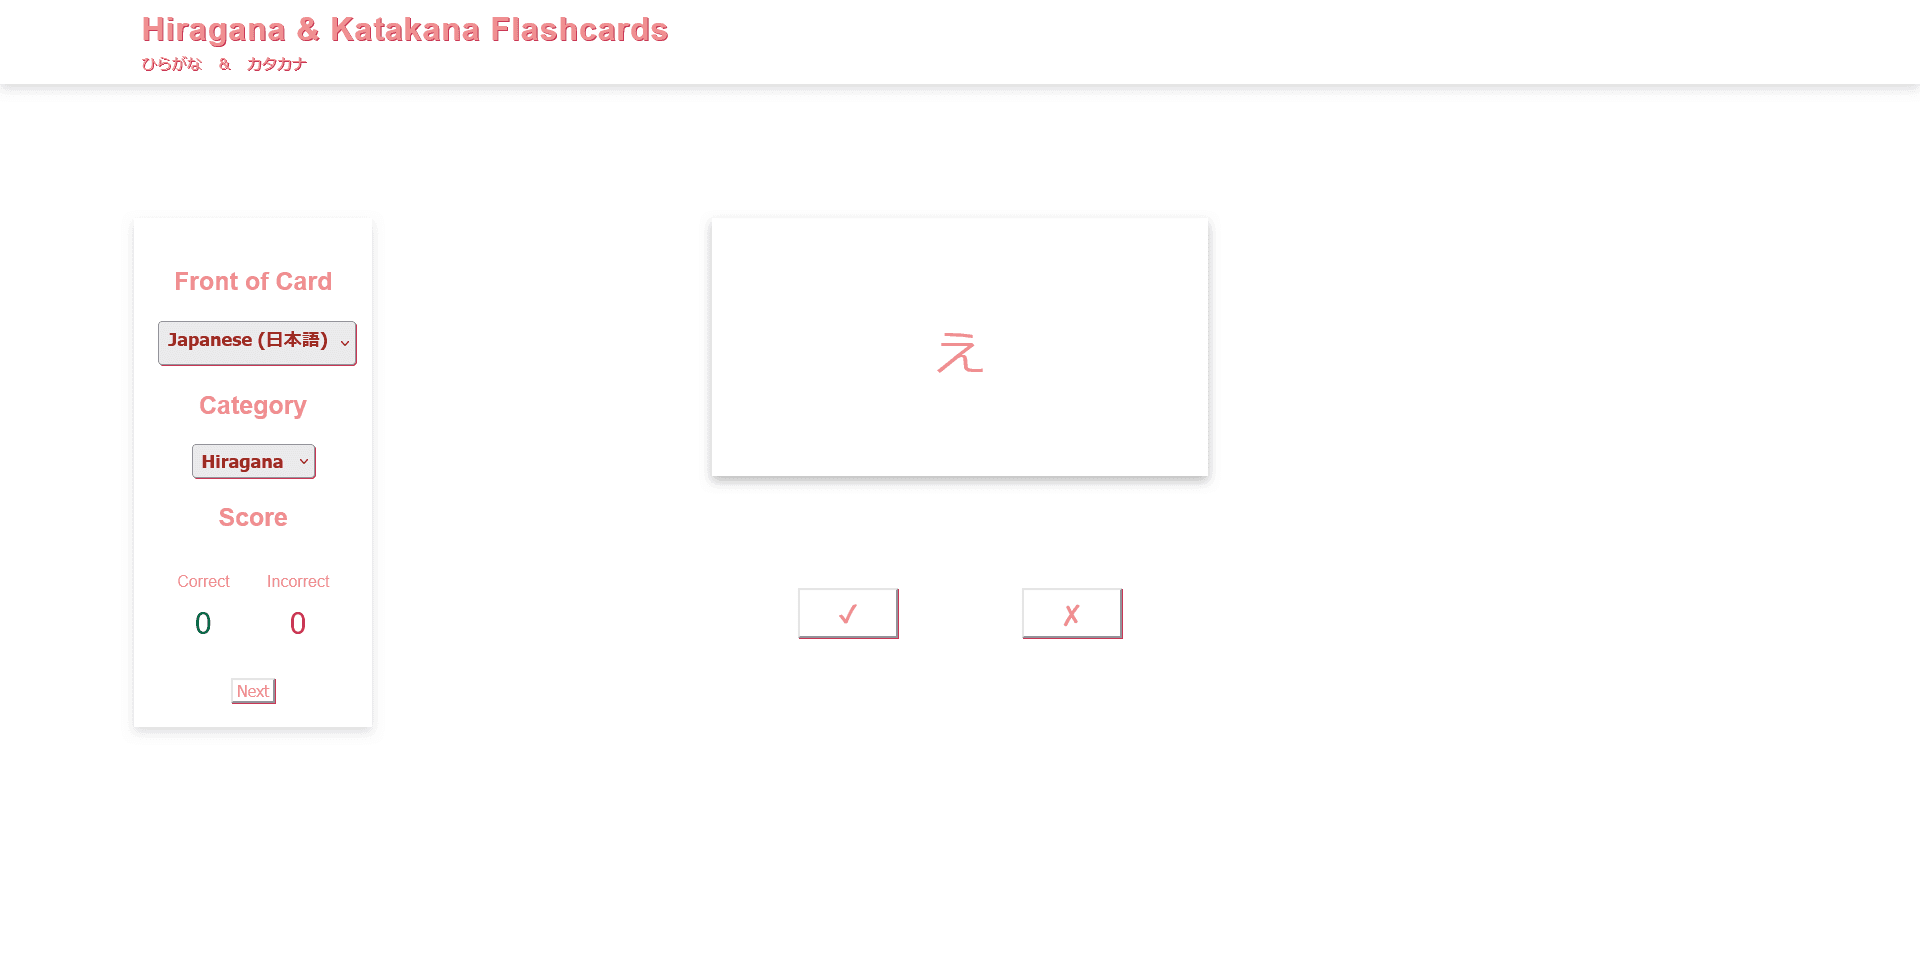
The Flashcards
Now that the Japanese characters are matched up with their English counterparts, we can start on creating the flashcards.
State
First, initialize the values in the state:
this.state = {
    showAnswer: false,
    initialCharacter: "",
    frontOfCards: "japanese",
    category: "hiragana",
    hiragana: Hiragana,
    katakana: Katakana,
    correct: 0,
    incorrect: 0,
};this.state = {
showAnswer: false,
initialCharacter: "",
frontOfCards: "japanese",
category: "hiragana",
hiragana: Hiragana,
katakana: Katakana,
correct: 0,
incorrect: 0,
};Let's go through each of these:
- "showAnswer" being set to false means that a Japanese character will be displayed on the front of the card initially.
- "initialCharacter" is set as an empty string and will be set as a random character when the page loads.
- "frontOfCards" sets the language that is shown on the front of the card.
- "category" determines the alphabet to be used.
- "hiragana" & "katakana" are set to the JSON strings that contain all the characters.
- "correct" & "incorrect" keep track of the number of correct and incorrect answers the user has given.
Display the Flashcard
Now it is time to create the flashcard component.
import React, { Component } from "react";

class Flashcards extends Component {
    render() {
        return (
            <div className="card">
                <a href="#" onClick={() => this.props.flipCard()}>
                    <div className="card-content">
                        <p>{this.props.textToDisplay()}</p>
                    </div>
                </a>
            </div>
        );
    }
}

export default Flashcards;import React, { Component } from "react";
class Flashcards extends Component {
render() {
return (
<div className="card">
<a href="#" onClick={() => this.props.flipCard()}>
<div className="card-content">
<p>{this.props.textToDisplay()}</p>
</div>
</a>
</div>
);
}
}
export default Flashcards;There are two necessary functions for this component, "flipCard" and "textToDisplay."
The "flipCard" function is pretty simple. Whenever the card is clicked, it sets "showAnswer" to true or false, depending on what it is currently set to.
flipCard() {
    if(this.state.showAnswer === false) {
        this.setState({ showAnswer: true });
    }
    else if(this.state.showAnswer === true) {
        this.setState({ showAnswer: false });
    }
}flipCard() {
if(this.state.showAnswer === false) {
this.setState({ showAnswer: true });
}
else if(this.state.showAnswer === true) {
this.setState({ showAnswer: false });
}
}The "textToDisplay" function checks the state for the values of "frontOfCards" and "showAnswer" to determine whether it will show Japanese or English.
textToDisplay() {
    if(this.state.frontOfCards === 'japanese') {
        if(this.state.showAnswer === false) {
            return this.state.initialCharacter.japanese;
        }
        else if(this.state.showAnswer === true) {
            return this.state.initialCharacter.english;
        }
    }
    if(this.state.frontOfCards === 'english') {
        if(this.state.showAnswer === false) {
            return this.state.initialCharacter.english;
        }
        else if(this.state.showAnswer === true) {
            return this.state.initialCharacter.japanese;
        }
    }
}textToDisplay() {
if(this.state.frontOfCards === 'japanese') {
if(this.state.showAnswer === false) {
return this.state.initialCharacter.japanese;
}
else if(this.state.showAnswer === true) {
return this.state.initialCharacter.english;
}
}
if(this.state.frontOfCards === 'english') {
if(this.state.showAnswer === false) {
return this.state.initialCharacter.english;
}
else if(this.state.showAnswer === true) {
return this.state.initialCharacter.japanese;
}
}
}Initial Character
You may remember that "initialCharacter" is still an empty string. That needs to be addressed now. I implemented a function to randomly pick a character out of the list of characters.
random() {
    if(this.state.category === 'hiragana') {
        const keys = Object.keys(this.state.hiragana);
        const randIndex = Math.floor(Math.random() * keys.length);
        const randKey = keys[randIndex];
        const letter = this.state.hiragana[randKey];
        return letter;
    }
    else if(this.state.category === 'katakana') {
        const keys = Object.keys(this.state.katakana);
        const randIndex = Math.floor(Math.random() * keys.length);
        const randKey = keys[randIndex];
        const letter = this.state.katakana[randKey];
        return letter;
    }
}random() {
if(this.state.category === 'hiragana') {
const keys = Object.keys(this.state.hiragana);
const randIndex = Math.floor(Math.random() * keys.length);
const randKey = keys[randIndex];
const letter = this.state.hiragana[randKey];
return letter;
}
else if(this.state.category === 'katakana') {
const keys = Object.keys(this.state.katakana);
const randIndex = Math.floor(Math.random() * keys.length);
const randKey = keys[randIndex];
const letter = this.state.katakana[randKey];
return letter;
}
}This function is called when the page loads to set "initialCharacter," and whenever the "next" button is clicked.
Toolbar
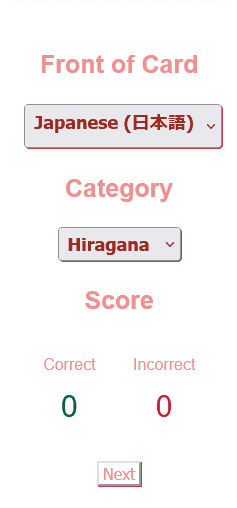
Next, another important part of this app is the toolbar. In this component, it will be possible to change the language on the front of the cards, change between Hiragana and Katakana, see the score, and move on to the next card.
The first dropdown controls the language that appears on the front.
frontDropDown(e) {
    this.setState({ frontOfCards: e.target.value });
    if(this.state.showAnswer === true) {
        this.setState({ showAnswer: false });
    }
}frontDropDown(e) {
this.setState({ frontOfCards: e.target.value });
if(this.state.showAnswer === true) {
this.setState({ showAnswer: false });
}
}The next sets the alphabet to Hiragana or Katakana.
categoryDropDown(e) {
    this.setState({ category: e.target.value },
        ()=> {this.setState({ initialCharacter: this.random() })});
    if(this.state.showAnswer === true) {
        this.setState({ showAnswer: false });
    }
}categoryDropDown(e) {
this.setState({ category: e.target.value },
()=> {this.setState({ initialCharacter: this.random() })});
if(this.state.showAnswer === true) {
this.setState({ showAnswer: false });
}
}Finally, the score is determined by the "correct" and "incorrect" variables in the state and is incremented whenever the correct or incorrect buttons are clicked.
Conclusion
These are all the pieces necessary to create a simple flashcard app. If you want to create your own, feel free to fork my repository and swap out the alphabets with one you're interested in. Or you can create your own from scratch using some of the things I wrote about!
Thank you very much for reading this post! I hope you enjoyed it and learned something you can use in your own projects.